Hello friends, let’s know how to set up a Sarkari Yojana, or Government Scheme updates website on the popular theme Astra Free version of WordPress.
You can create the industry standard design for your website in just a few clicks when you buy Sarkari Yojana Templates from WP Enhence at very low prices.
Here are ways you can design your website. First of all a guide if you are implementing this template on WordPress. And if you are implementing this template on a WordPress website, follow the other guide.
In all cases you can follow our video guide lines.
Install Sarkari Yojana Template On WordPress Website
Step 1: After Install WordPress
- Go to Post Area, and Delete Hello Word Post.
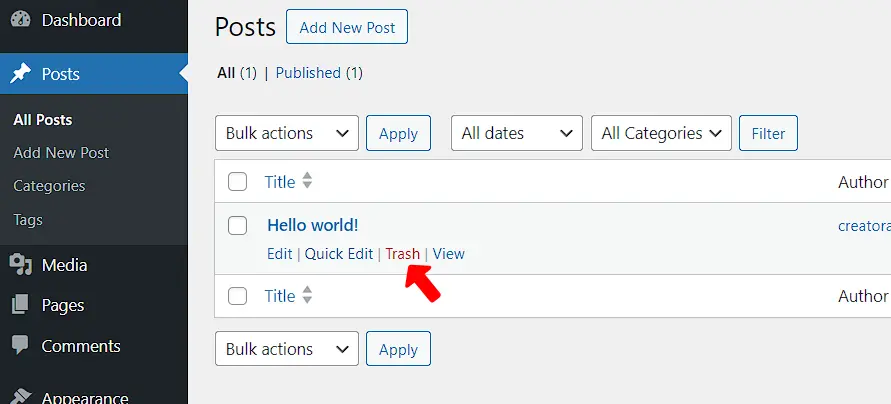
- Go to Page Area, Delete Sample Page Area.

Step 2: Upload “Step 1 (Import Post, Pages, Media)” File. For That,
- Go to ‘Tools’ and Click ‘Import’ Option.

- Install ‘WordPress’ and ‘Run Importer’

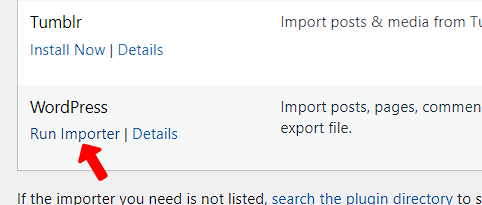
- Open The Download File and Extract Here
- After Run Importer Option. You will see an option to upload a file, click there.

- Open ‘Step 1‘ Folder and Select the File and Upload it.

- Now Click ‘Upload file and import‘ Option.
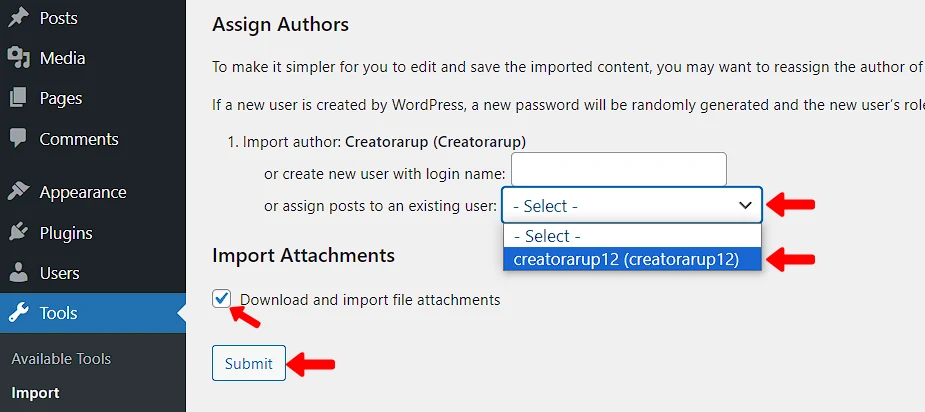
- Now Assign your current Username, Tick Download and Import Option, And Click ‘Submit‘ Option.
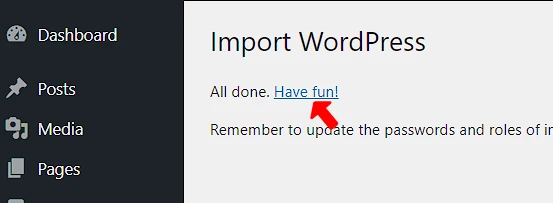
- Now Click ‘Have Fun‘ option
Step 3: Now See The Result
Now see that some posts, pages, and media have been imported into your WordPress area.
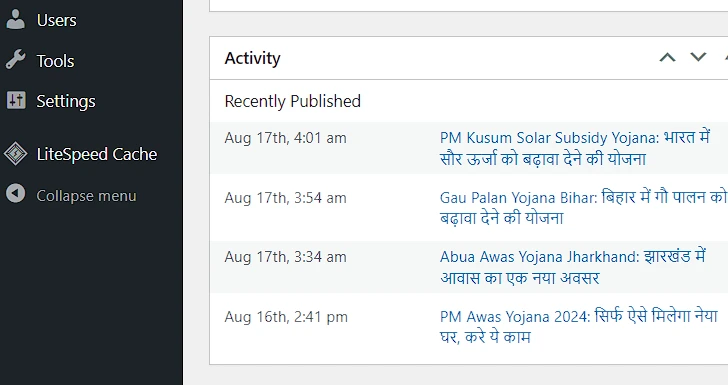
Note: All posts, pages, and media imported here are used for demo purposes. You can delete them if you want, or edit them yourself.
Step 4: Install Theme
- Go to ‘Appearance‘ > Click on ‘Theme‘ area.

- Click Add New > Type ‘Astra‘ on Search Box.
- Install and Activate the Theme.

Step 4: Install Plugin
- Go to Plugin Area, and Click on ‘Add New Plugin‘ Option.
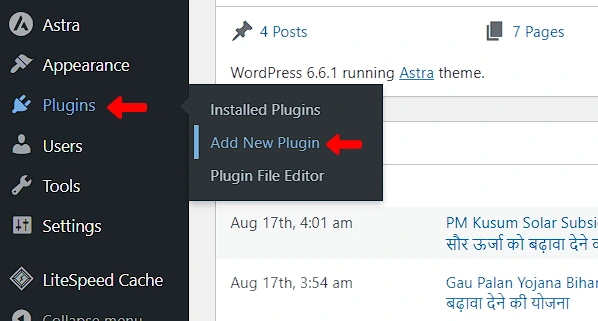
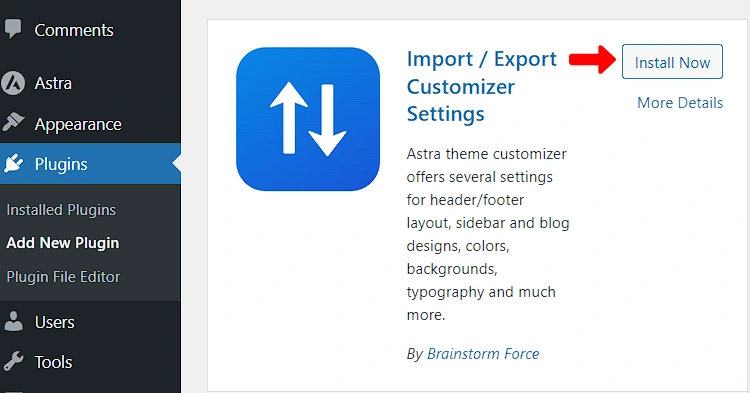
- Type’ Import / Export Customizer Settings‘ on search Box. Install, Activate this plugin.
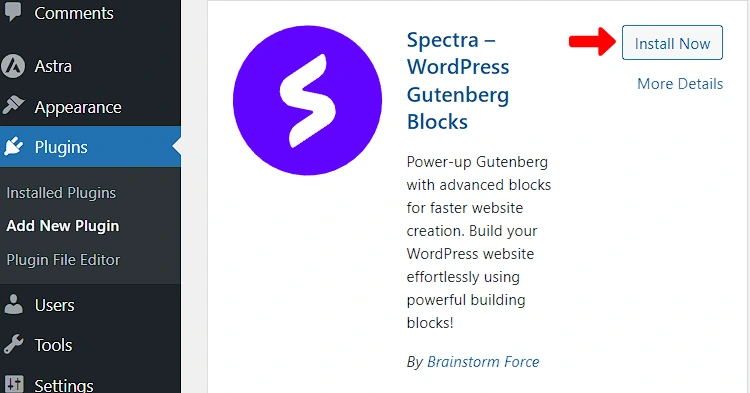
- Install another plugin in same method Which named is ‘Spectra‘. Install and Activate this plugin also.
Now see that your website has made several changes but there is still some work to be done. That we have to do.
Step 4: Import Customization
- Go to Again Plugin area, > ‘Click on Installed Plugin‘ option.
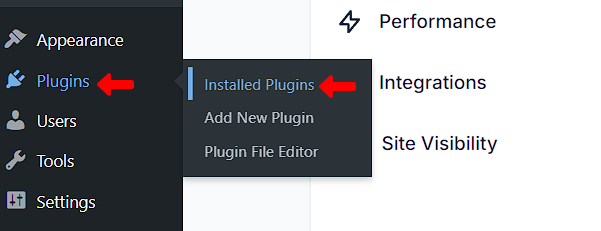
- Click on Setting area of Plugin ‘Import / Export Customizer‘ which we have already installed.
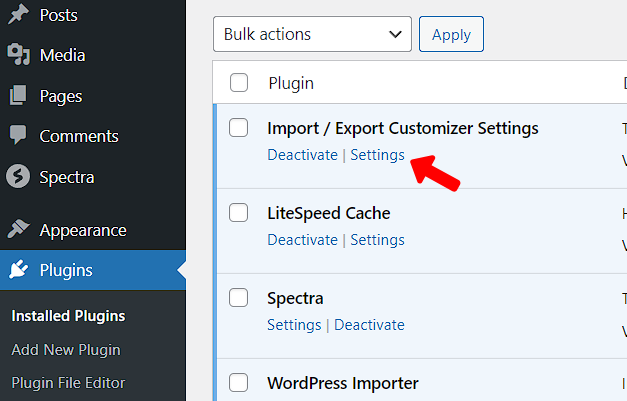
- Here you will see the import settings area.
- Click on ‘Choose File‘ Button.
- Go to the downloaded file (which we have provided).
- Open the Step 2 folder, And select that file and click on ‘Import‘ Option.

Step 5: Change Some Setting
- Go to Setting area, >Select Homepage, Select a static page from your homepage display options area.
- Click on Save Changes.
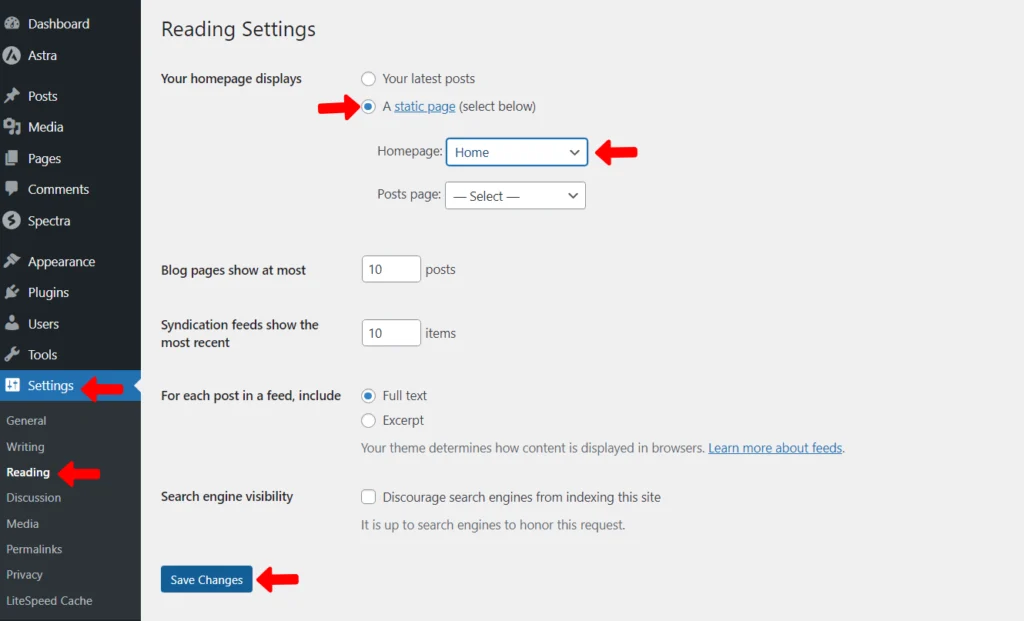
- Purge all cache from cache plugin.
NEXT
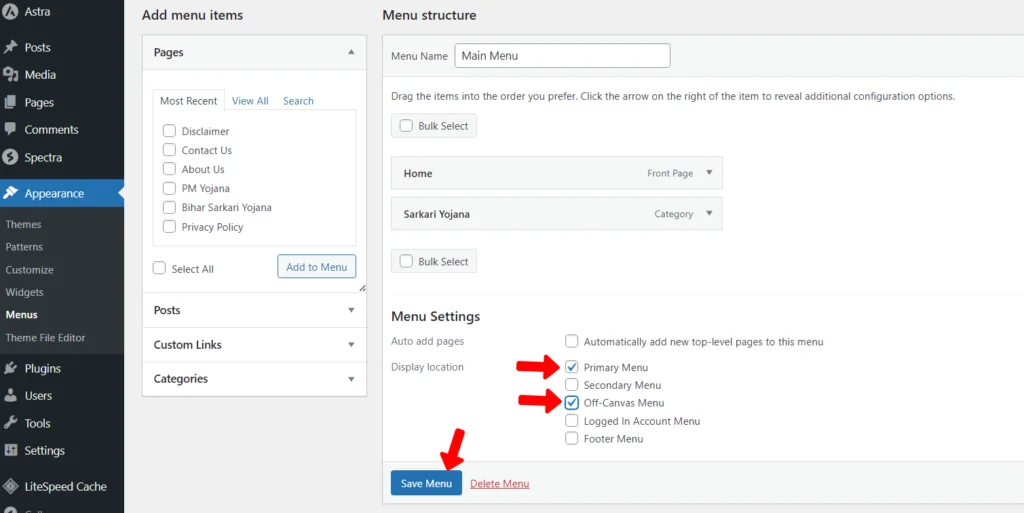
- Go to Go to ‘Appearance‘ > Click on ‘Menu‘ area.
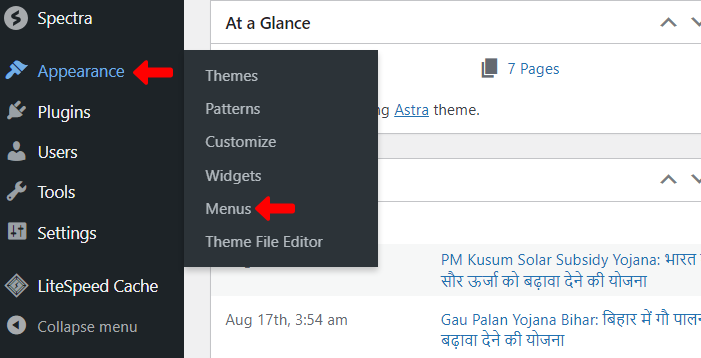
- Select Main Menu

- Select Display Location As a Primary Menu, Off-Canvas Menu and Save Menu.
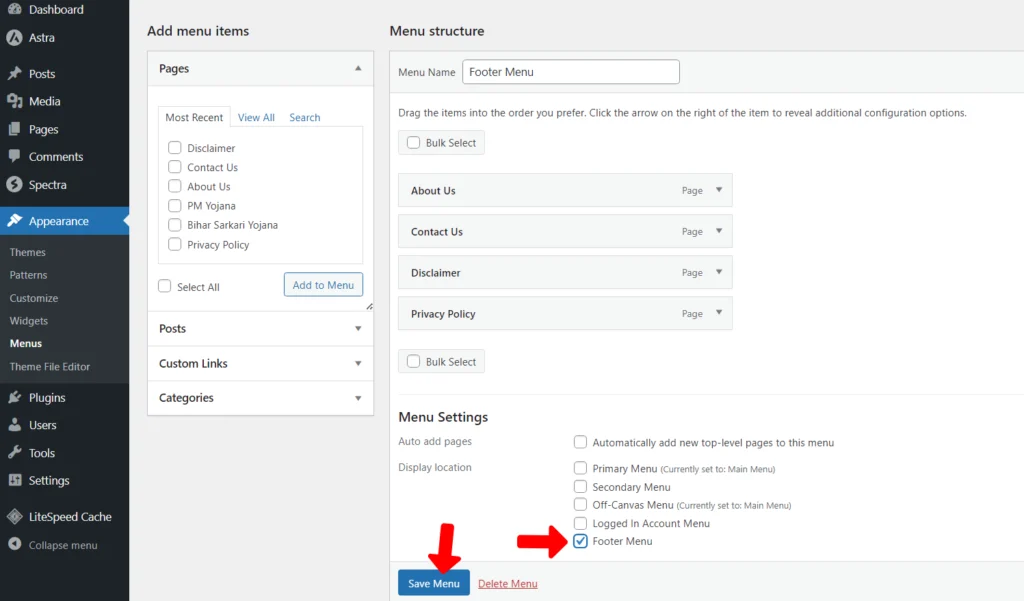
- Again Click on Menu Option, Select Footer Menu.

- Select Display Location As a Footer Menu and Save Menu.
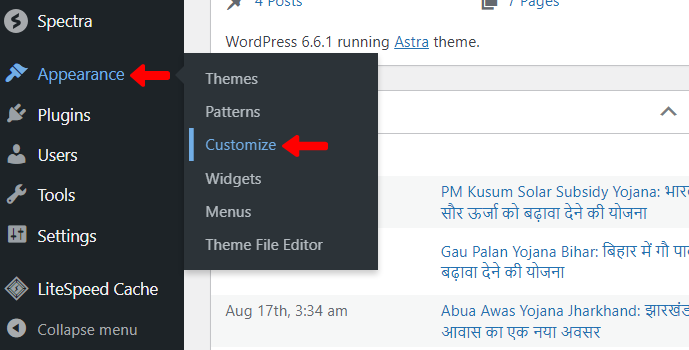
- Go to Go to ‘Appearance‘ > Click on ‘Customization‘ area.
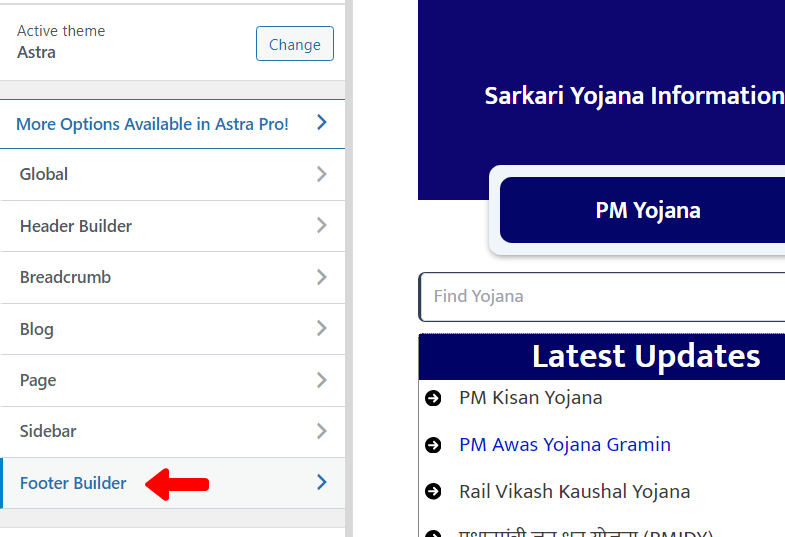
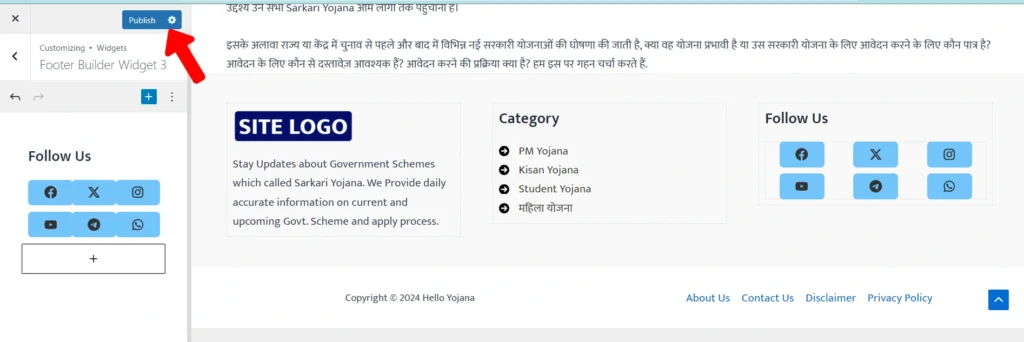
- Go to ‘Footer Builder‘ area.
- Click on the Widgets 1 area. And copy the Widgets 1 to the file we provided. And paste it here with a paragraph block.
- Do the same in the 3 Widgets area.
- Finally Publish It.
All Done Have Fun!
